|
1/26/2004
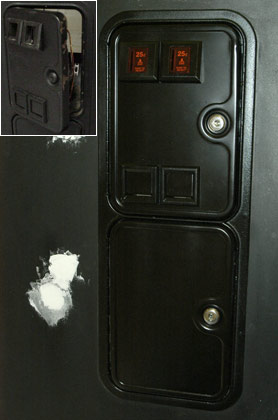
The coin box with coin mechanisms installed.
New coin return buttons were a must - of the old ones, one was broken and one had been painted black... or maybe that was aged pizza grease? Yuk! For the new buttons, I printed off some nice Atari logo inserts that were provided by Mike's Arcade. The secret to these is to use good paper, but nothing too thick, else the light won't shine through. Also use a high-quality printer or else it'll look terrible.
|
3/7/2004
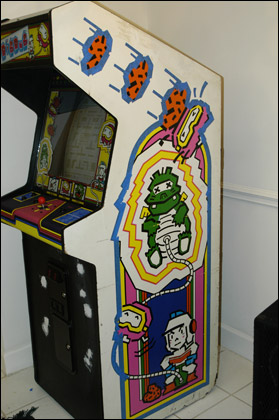
Since there is no source for Dig Dug reproduction side art, I've taken the hard route and have started masking off the side art to paint white around it. I made certain to use masking tape that wouldn't remove the paint! 3M safe-release had great results.
A close-up of the masking process. Those rocks on the side are a real pain. As you can see, it looks like there's quite a bit of overspray from brown paint on the side. Once the art is masked off, I'll be patching up the dents and scrapes on the sides with wood filler, sanding them down, then repainting the sides in flat white.
|
3/19/2004
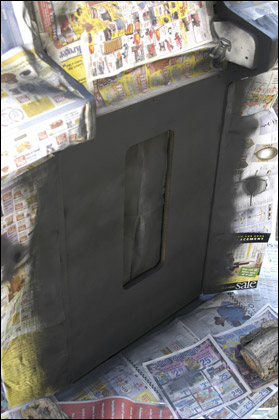
Before painting, the marquee, bezel, control panel, coinbox assembly, and the monitor were removed. Dig Dug is going to be out of commission until a few more steps have been completed.
Since I patched holes in the kick plate with wood filler, a coat of primer was needed to ensure that the filler wasn't seen. After that, the kick plate was finished with many coats of flat black paint (with some sanding between many of the coats).
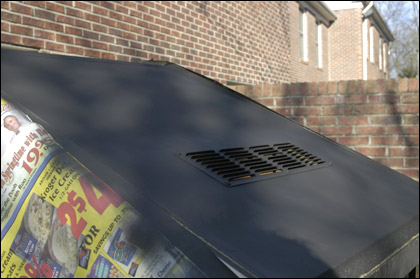
The top was also refinished as well with the same process. Tomorrow we'll be working on the sides.
|

|